
Gardena Wood Flooring handles wood floor refinishing in Gardena, CA, serving surrounding cities including Alondra Park, West Athens, West Rancho Dominguez, Lawndale and Hawthorne. After 20+ years of sanding floors in this part of the South Bay, our starting assumption is that the floor you have is worth keeping, and the estimate tells you whether a recoat, a full sand or a few replaced boards will get it there.
A refinish is not one job. A dull floor with a sound finish needs a light abrasion and a fresh coat, while a gray, scratched or waxed floor has to go back to raw wood. Picking the wrong one costs money twice, so we test the existing finish before we recommend anything.
The rest of this page covers what refinishing can and cannot fix, the stain and finish decisions you will be asked to make, what changes in an older house, and the order we work in from the first visit to the day the furniture goes back.
What Refinishing Can and Cannot Fix
Wear, Scratches and Graying in the Finish
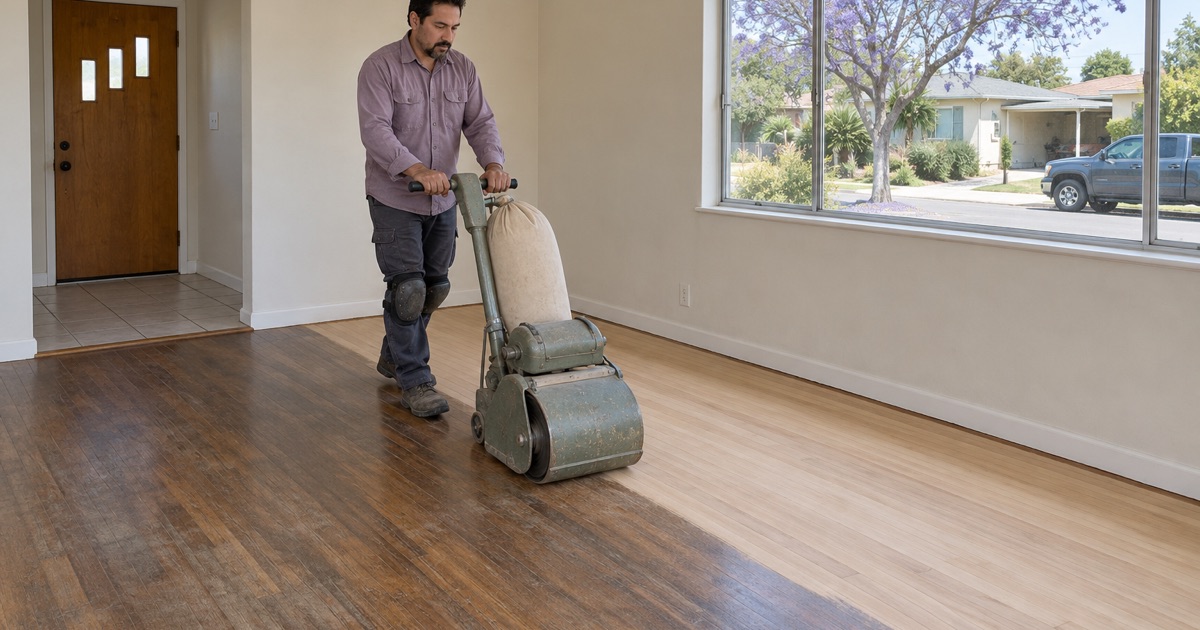
Most worn floors are worn in the finish, not the wood. Traffic lanes turn gray where the coating has worn thin, chair legs leave scratches, and sunlight fades the color near windows. A full sanding removes all of that along with any sander marks from past work, and a new finish seals the boards again.
Where the finish is dull but still continuous, a screen and recoat is the lighter option. We abrade the existing coating with a buffer and screen, clean the dust, and apply a new coat that bonds to the old one.
Problems That Sit Deeper Than the Surface
Sanding cannot fix what is happening underneath. Cupping from moisture below, boards that move or squeak, and soft spots over failed decking all come back through a new finish if they are not dealt with first. We check for those during the estimate and fix them before the sanders come in.
Deep stains are the other limit. Pet urine and long-standing water turn oak black, and that color usually runs deeper than a sander can reach without thinning the board too far. Replacing those boards with a weave-in repair is the honest answer.
Floors That Have Been Sanded Before
Every full sanding removes wood, and a floor that has been refinished several times may be closer to the tongue than it looks. We pull a register cover or check a threshold to see how much remains, then choose a grit sequence that takes off only what the job needs.
Stain and Finish Choices
Picking a Stain Color on Your Own Floor
Stain looks different on every species and even on boards from the same lot. Red oak can go pink under some gray tones, and maple and birch often take stain unevenly, which reads as blotchy stain once the floor is finished. We brush several samples onto a sanded section of your floor and let you choose in the room’s own light.
A natural finish with no stain is also a choice, and on older oak it is often the best one. It shows the grain as it is, avoids any blotching risk, and makes future touch-ups and board repairs far easier to match than a custom color.
Waterborne, Oil-Modified or Hardwax Oil
Waterborne polyurethane stays clear, dries fast and has a mild odor, which suits an occupied house. Oil-modified polyurethane builds a warmer, amber tone that deepens over the years. A hardwax oil finish soaks into the wood for a matte, natural look and can be touched up in one spot, though it needs more regular maintenance.
Sheen level matters as much as the product. Satin and matte hide dust and small scratches far better than gloss, which is why most families with pets end up choosing one of them.
Finishes Legal Under SCAQMD Rule 1113
Floor coatings applied in the South Coast air basin are limited to 275 g/L of volatile organic compounds under SCAQMD Rule 1113. Every product we put down meets that limit, so the finish is legal here and the house carries less solvent odor while it cures.
Refinishing in an Older Gardena House
Oak Found Under Wall-to-Wall Carpet
The 1950s were Gardena’s busiest decade for new houses, and many of those homes were carpeted over their original strip oak decades ago. Once the carpet, pad and tack strip come out, those floors usually sand and finish well, and bringing them back often costs less than any new floor would.
Those floors come with their own clean-up. Tack strip leaves a line of nail holes around the edge of each room, the pad leaves adhesive or staples across the field, and closets may still have a darker patch where the carpet never reached. We pull every staple, fill the holes and sand the room as one surface so the old carpet line disappears.
Lead Paint and Sanding Dust
Most of the city’s houses were built before 1978, so baseboards, casings and shoe molding may carry lead paint. Lead dust from sanding is the hazard the EPA Renovation, Repair and Painting rule was written for. On those houses we contain the work area, run a dustless sanding system and clean to lead-safe practice before we leave each day.
That work is mostly invisible when it goes right. Plastic sheeting covers the doorways and registers, trim that is being removed comes off without dry scraping, and the final cleanup uses wet wiping and a HEPA vacuum rather than a broom, so paint dust does not travel into bedrooms that were never part of the job.
Old Tile and Mastic Near the Wood
When oak runs up to a kitchen or hallway that has old 9x9 floor tile or black mastic, we stop short of that material. It can contain asbestos, so it gets an asbestos survey before anything is scraped or sanded near it.
If the survey comes back clean, we can remove the tile and carry the wood floor through, or leave it and finish the oak to a clean transition with a reducer strip or T-molding. If it does contain asbestos, removal is handled under SCAQMD Rule 1403 before any floor work continues in that area.
Our Step-by-Step Wood Floor Refinishing Process
Step 1: Inspect and Test the Floor
We check moisture content with a wood moisture meter, test how the existing finish bonds, look for loose boards and soft areas, and measure how much wood is left above the tongue. The written estimate is based on what those checks find, and it says plainly whether we recommend a recoat, a full sand or repairs first.
Step 2: Repair Before Sanding
Loose boards are re-fastened, damaged boards are cut out and woven in, and nail pops are set. Doing this first means the sanders level the repairs together with the rest of the floor, so a replaced board sits flush instead of standing proud after the finish goes on.
Step 3: Sand and Contain
The main field is cut with a drum sander, edges with an edger and the final pass with an orbital sander, working through the grit sequence with dust extraction running. Doorways are sealed off throughout, and on a pre-1978 house the lead-safe steps above apply from the first pass.
Step 4: Stain and Coat
After the floor is vacuumed and tacked, stain goes down if you chose one, followed by the finish coats with the drying time each product needs between them. Each coat is lightly abraded before the next so the layers bond to one another rather than sitting loose on top.
Step 5: Leave a Written Cure Schedule
Before we go, you get the dates for socks, shoes, furniture and rugs, room by room, so you can plan the move back in around them. We also leave care notes for the finish you chose, including which cleaners to avoid so the new coating is not dulled in its first months.
- 20+ Years in Business
- Written Moisture Readings
- Lead-Safe Work Practices